Let’s Get Started
Take the next step - contact one of our experts or explore our full line of metal roof systems.
Contact Our Experts View Our Products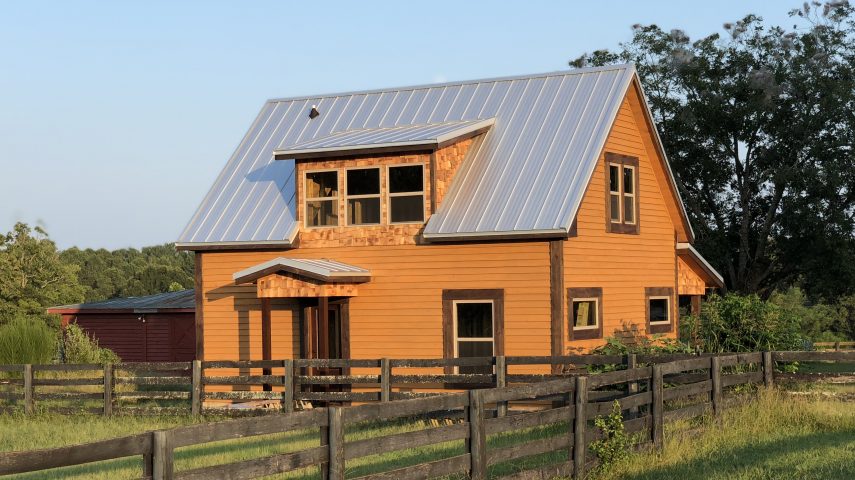
Learn the basics of metal roofing – products, tools, and terminology.
Metal roofing can be broken into 2 main categories: panel and decorative.
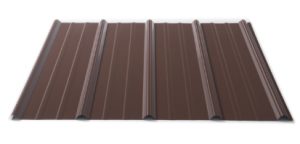 A metal roofing system is labeled a panel if it comes in long sheets and has ribs: raised portions of the panel that provide strength and rigidity. Typically, panels run continuously from the peak all the way down the gutter, though they are sometimes installed in multiple rows.
 A metal roofing system is considered decorative if it is stamped to provide the appearance of another product such as shingles, shakes, slate, or tile. These are typically smaller sections that are installed in rows and staggered as you go up the roof. Less commonly, some types may be in longer “panel” sections.
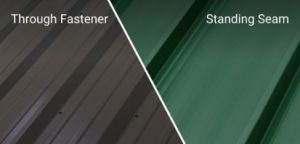 Through fastened systems install the fastest of any metal roofing – fastened with long-lasting screws that are: painted to match, have a neoprene rubber seal, and a metal cap that protects that seal from the sun’s UV rays.
Typically, through fastened panels come 2’ to 3’ wide by 3’ to 45’ long. They can be installed on everything from residential applications to agricultural and commercial applications.
Finish options include baked-on enamel paint, a mill finish Galvalume, or in some cases, mill finish galvanized.
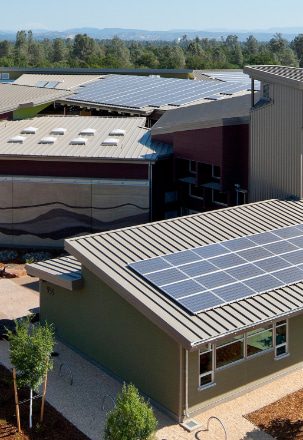
Standing seam systems take a bit longer – they are fastened via hidden clips or a hidden side flange. Most systems snap-lock together, but a few commercial options require a mechanical seamer to tighten the seams. The lack of exposed fasteners is both a benefit visually and functionally – standing seam systems can last 100 years and upwards if repainted at about the 50-year mark.
Finish options are similar to through fastened panels, though high-end Kynar® paints are available in heavier gauge options.
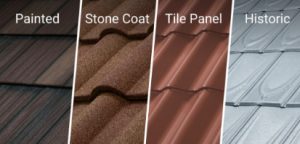 Decorative metal roofing is easily split into painted shingle sized, stone coated shingle sized, larger metal tile panel sized, and galvalume historic shingles.
Painted shingle size systems are made from G-90 galvanized steel that is then primed and painted with a high-end Kynar® paint finish. These systems interlock on all 4 sides and can be stamped to look like shingles, shakes, slate, flat tile, and barrel tile. Hidden fasteners ensure a permanent seal.
Stone-coated shingle size systems are made from galvalume coated steel that then has a base coat, stone granules, and a clear overcoat added. These systems overlap right and left, overlap or interlock top and bottom, and can be stamped to look like shingles, shakes, slate, flat tile, and barrel tile. Fasteners are either hidden or fastened into the vertical leg of the panel nose, thus outside primary water draining areas.
Larger metal tile panels are made from G-90 galvanized steel that is then primed and painted with a high-end Kynar® paint finish. Peak to gutter lengths are possible in many situations, eliminating vertical overlaps. Horizontally, panels are lapped similarly to standard panels. These panels are fastened with long-lasting screws that are: painted to match, have a neoprene rubber seal, and a metal cap that protects that seal from the sun’s UV rays.
Galvalume historic shingles are in a category all their own. These Victorian-era metal shingles are stamped in very small shingles designed to replicate those popular in the 1880s through the 1920s. Water-shedding, not water-tight, these systems require a full peel & stick underlayment be installed prior to panels. Panels overlap at top and bottom, and have a hidden fastener interlocking design right and left.
Regardless of the type of metal roofing you go with, you need to understand what a roof is, and its purpose.
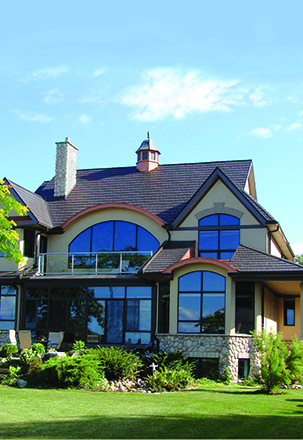
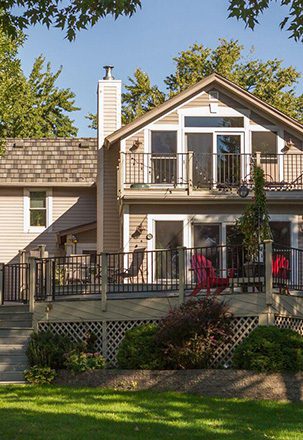
A roof is the uppermost portion of a building, sheds water, and typically receives the heaviest portion of abuse from outside elements. For this reason, the primary purpose of a roofing system is to protect your home from these elements. Elements that affect roofs include rain, sleet, snow, hail, wind and wind-driven objects, heat from the sun, and wind-carried sparks/embers.
Another purpose of a roof is to add value and beauty to the structure – a roof is a crucial design element that ties all the others together. The right roof can, as one homeowner put it “make a $250,000 home look like a $500,000 home.” With today’s photo and drone happy real estate market, the right roof truly makes the house.
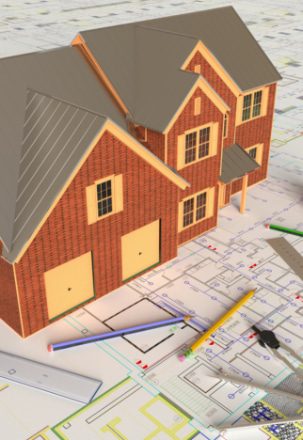
 Before you consider installing your own roof, you also need to know the sections or components that make up a roof.
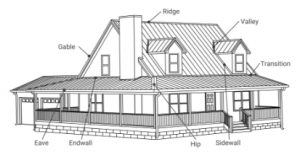
Aside from the field of the roof, where panels or shingles are installed, each boundary of a roof area has a name, and typically, a flashing that is installed at that location.
Becoming familiar with these boundaries will help you be more prepared to obtain a quote on materials, and more prepared to DIY!
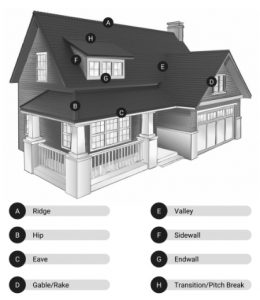 Regardless of the type of roofing: metal, asphalt, clay tile, or other; each area of the roof has a name that is consistent. Even before roofing material is installed that area of the deck still carries the same label.
Here are some common roof areas:
Typically, the name of the roof flashing used will be the same or similar to the name of that roof area.
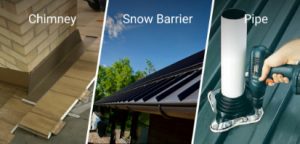 Nearly every roof has at least 1 penetration: a vent pipe for a bathroom. Many other types of penetrations and attachments exist including:
And some most often found on commercial roofs:
While the list might seem exhausting, most roofs have only a couple of types of penetrations/attachments.
Penetrations can usually be broken down into two categories: round and rectangular. Round penetrations are usually sealed with pipe flashing. Rectangular penetrations are often sealed with metal flashings, though for smaller penetrations sometimes square base pipe flashing can be used. On extremely low slope roofs, curbs may be built around skylights and other rectangular penetrations
Regardless of the penetration type, rely on the flashing as your primary weather protection – tube and butyl sealants should be secondary protection. Avoid filling large gaps with sealant – do it right using the right flashing for the specific penetration.
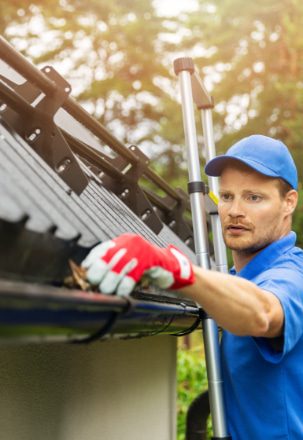
From safety to installation, the right tools make the job.
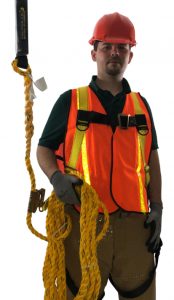 Consider safety in everything you do – from clothing and fall protection, to when and where you work on your roof:
Be prepared before you get on the roof – learn about the right gear and how to use it. The right fall protection could save your life.
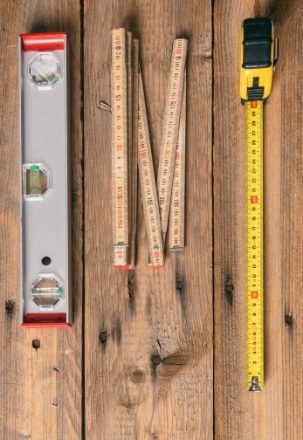
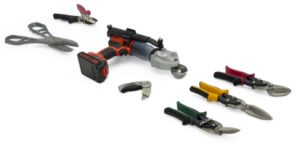 After you’ve ensured your safety, move on to some other tools to consider:
This is the exhaustive list – some tools are specific to certain types of metal roofing. On simpler projects, often the list of needed tools is much shorter.
Take the next step - contact one of our experts or explore our full line of metal roof systems.
Contact Our Experts View Our Products